Here it is as promised. My review of the Civilian Marksmanship Program (CMP) Advanced Maintenance Course (AMC). Sit back as this will be a little lengthy.
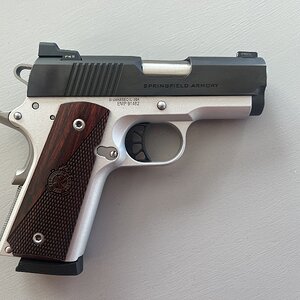
First, some background on the course. The AMC was started by the CMP Custom Shop a few years ago as a way to teach shooters how to work on and maintain their M1 Garands by allowing them to build a CMP Special Grade M1. If you are not familiar with the Special Grade M1s they are basically as close to a new production M1 Garand as you can possibly get. They start as a stripped, inspected and re-parkerized USGI M1 Garand receiver. The receiver is mated to a new production Criterion 1-10 twist, 4 grove Criterion barrel built to the original USGI specs. A USGI bolt, trigger group, gas chamber, operating rod, and all internals are assembled into the receiver and then fitted with a new production wood stock with a CMP Cartouche. These are designed to be true collector pieces and it is highly un-likely that all parts will be correct to the receiver. The barrel and stock are they only pieces that are guaranteed to be new production but some of the small internal pieces may be modern reproductions. All parts are inspected for wear or damage, repaired as necessary, and re-parkerized. They are then assembled by CMP armorers, test fired to ensure they function properly and then are shipped in a hard case with a new production USGI web sling, one en-bloc clip, user manual, and chamber flag.
Day 1: I arrived at the CMP Custom shop, was greeted by Jeremy Coppock, the admin guy for the CMP Custom Shop (and former CMP armorer). He told me to find a spot at the work bench before pointing out the coffee pot and boxes of Krispy Kreme donuts. Class started promptly at 8 am with a brief introduction by Chris Hord, the head of the CMP Custom Shop. Next we were welcomed to the to the class by Mark Johnson, the COO of the CMP. Mr. Johnson gave us a brief run down on everything currently going on with the CMP to include the little nugget that they are expecting a shipment of M1 Garands being returned to the US from the Philippines. He then took our questions which mostly pertained to the future plans for the CMP as supplies of M1 Garands in the world are dwindling or when the CMP will begin selling 1911’s. He didn’t say much about their future plans other than they have plans in the works. As for the 1911’s he has no idea. Congress has authorized the Department of Defense to begin releasing 1911’s to the CMP (only about 85,000 1911s) but as usual the DoD is dragging its feet and Senator Harry Reid is trying to kill the 1911 program by attempting to add an amendment to the most recent National Defense Authorization Act directing the DoD is destroy and melt down all 1911’s in inventory (amendment was defeated). After Mr. Johnson finished with us he turned the class back over to Chris Hord who had all his instructors introduce themselves and then had us introduce ourselves. As soon as the introductions where finished he dove right into the course material. We watched a short video introducing the course, where given a rough timeline for the next 3 days, Chris went over in great detail about what to look for and what to watch for when looking at M1s at a gun shop or gun show. For everything he told use to look for he had a physical example on a display table that we could look to see what exactly he was describing. We moved onto what to look for and how to pick out what would be the best receiver and bolt for our build. After the presentation on receivers Chris and his instructors pulled a blanket off a table covered with receivers and bolts that we examined and study before deciding what to choose. We got lucky as all the receivers they had available to us at the time where all Springfield receivers and all where WW2 war time receivers. I chose a very nice 6-digit receiver (serial no. 92XXXX) that was a perfect example of the two tone receiver indicative of early receivers (prior to about 2.1 million serial series) that was caused by a molten lead annealing process to strengthen the steel in the receiver heel. This was necessary because of the designed recoil action causes the harden steel bolt to actually strike and bounce of the receiver heel. Early models used a weaker steal and some, not all, showed evidence of damage and cracking in the receiver heel. To correct the issue starting at about the 2.1 million serial series the steel was changed to a stronger steel and earlier models had the heels dipped in molten lead to anneal and strength the steel. After selecting our receivers and bolts Chris gave a presentation on lapping the bolt to the receive to ensure the best possible fit between the bolt, receiver and barrel. This format of watch a video and presentation on the next step then do the work on our rifles would continue for the entire class. I was lucky, and was able to lap my bolt fairly quickly and just about as perfect as you can get. Other in the class had to put a great deal of effort into properly lapping their bolt but it is an important step in accurizing the rifle and is an added benefit to attendees of the AMC as standard Special Grade M1s don’t have the bolt lapped to the receiver because it is not necessary for proper function but more about accuracy. Once we finished lapping our bolts we were given the brand new barrel produced by Criterion that we would be installing on our rifles. Installing the barrel also involves timing the receiver and gas chamber which also serves as the front sight base to top dead center and aligning both down the central axis of the bore to produce the best accuracy possible. The method we used to time the receiver and gas chamber actually produces much tighter tolerances than the GI spec as well as being once again better than a standard Special Grade M1. We broke for lunch, which was actually a great surprise as we all figured deli type sandwich, pizza, or the like. However, all the staff at the Custom Shop actually put out a great spread for lunch. For Day 1, lunch was buffalo wings, chicken tenders, mac and cheese, corn fritters, and coleslaw. After lunch, we were given a tour of the warehouse attached to the custom shop by Floyd (can’t remember his last name). Lloyd is retired US Marine who was an armorer and maintainer on the M1 Garand when it was still in active service in the US Military. Mr. Floyd is now the first to go through every crate of M1 Garands released to the CMP. As such he is able to occasionally find some treasures such as the occasional Never issued and completely unused M1s. Any treasure he may find Floyd puts aside to go to the CMP’s auction sight. This last part of Mr. Floyd’s tour was a display of unique M1, 1903s, and 30-40 Krags he has found to include a function M1 Garand captured by US Forces in Afghanistan from a Taliban fighter. After touring the warehouse, we carpooled over to the CMP Armory (about 3 miles away) where all M1 Garands are inspected, graded, test fired for function and safety, and readied for shipment. The Armory is also where the Special Grade M1 Garands are assembled by CMP Armorers. After the tour it was back to the Custom Shop where we finished getting our barrels installed. Once our barrels were installed we moved onto finishing our chambers. All Criterion barrels are short chambered by 0.020â€. This is done to ensure that the barrels will fit any receiver and bolt combination it is installed on be able to properly headspace. This meant we would all be using a pull through reamer to properly cut chamber and set the headspace. This was a fairly lengthy process involving a lot of cutting, cleaning, checking, head space and cutting some more until the barrels where properly head spaced. Once we had this finished it was the end of Day 1. We all left feeling quite proud of what he had accomplished during the but definitely exhausted.
Day 2: Day 2 Started once again promptly at 8am. This morning however we met at the CMP store which was being open for us. I purchased 400 rounds of Greek Surplus M2 ball ammo and a case of en-bloc clips as the CMP no longer has the spam cans with ammo packed in bandoleers and clips available for sale. Couple guys bought a rifle but mostly it was just ammo all around. Once we got to the shop we jumped right into work. We started off with assembling our trigger groups. We took this a single step and a single piece at time. Chris does this to show what to look for when looking at parts and to illustrate part interaction that are important to a safe rifle as well as being important for accurizing. Once the trigger groups where assemble they had us dis-assemble them the wrong way to show us what happens when this is done and how to fix it if we ever do it. After the dis-assembly we spent some time putting together and taking apart our trigger groups to get a feel of how to do it. Next we moved on to a presentation about operating rods, how to select an op-rod, and important safety concerns to look for whenever you may be looking at an op-rod. We were then given an opportunity to select our op-rods. This started one of the most time consuming parts of the assembly process. Once an op-rod was selected it had to be test fit to our barreled receivers to ensure the op-rod moved freely and smoothly. Some of us got luck on our first try, some had to try several op-rods before they found one that worked with their rifle. Once, we all had our op-rods we finished installing the receiver parts. As with the trigger group we took this step by step and piece by piece as the pieces have to fit together in a very specific way or else the rifle will not function. At this point we all began to understand how incredibly complex the Garand actually is. While we were working on the receiver internals we broke for a lunch of pulled pork sandwiches and coleslaw. During lunch we watched a couple of videos about the CMP Marksmanship Park in Talladega and watch the mandatory range safety video so we would be allowed to skipped that when we went to the range after class on day 3. After lunch we continued assembling out receiver parts. Once everyone had everything installed and moving freely we moved onto stock fitting. Stock fitting is the most time consuming portion of the calls. We install the upper hand guard, front hand guard, and got out gas chambers, gas chamber locking nuts, and gas plugs installed. This is where we ended day 2. Our rifles where beginning to look like a rifle and we were all excited for day 3.
Day 3: Day 3 began where we left with day 2. Final stocking fitting and installations. Being wood stocks every stock will be slightly different and will all require some fitting to fit the receiver. This is where I started to be un-lucky. My front hand guard was causing a binding issue. To fix this I had to pull it off my rifle and take a dremel tool with a cutting wheel to bring a shoulder on the guard back about 1/16th of an inch run the front of the guard against a sanding belt to remove just a little bit of material to alleviate the binding issue. My unlucky streak continued when I went to install the stock. Stock fit looked great but once I installed my trigger group a contact point between the stock and the receiver caused a tension point the cracked the stock at the front bottom of the magazine recess. Luckily this is the place for such an issue to happen. One of the instructors pulled another stock out of the box. A milling bit on the dremel removed the contact point that caused my first stock to crack and opened the inlay for the rear of the trigger guard to fit into the stock just right. As we each got out stocks fitted the instructors went around with op-rod springs and worked with us individually to get out actions timed. My luck partially returned for this. My action was not timing right but I was able to swap out my bullet guide and the action timed properly. Once we all had our stocks fitted in place and our actions timed we moved on to accurizing processes. The first process we covered was trigger jobs. Chris did an amazing job of explaining the process of a trigger job, pros and cons, and why it is really no necessary on an M1 Garand. He moved on to what the CMP Custom Shop calls a trigger clean up and which we would have the opportunity to perform if we wanted to do so. Oddly enough everyone wanted to do so. Now, I thought I had a very nice trigger to begin with, key word being thought. Turns out I was way off. I had a nice crisp first stage pull, but the second stage had an excessive amount of creep. The trigger clean-up process involves using a trigger stone to hone down the rear hooks of the hammer which reduces the distance between the front and rear hooks which reduces the amout of area on the front hook which engages the sear, taking the creep out of the second stage. Now my hammer was a brand new, un used hammer that was last touched sometime in the 50s. Since it was never installed in a rifle there was no wear on it which meant I had to remove quite a bit of material. That being said, a trigger stone, a good amount of elbow grease, and about 30 minutes and I now have a trigger that has about a perfect a first stage as you could want and a second stage with virtually zero creep that break clean and smooth at about 5.5-6lbs. Once everyone finished their triggers we took a class picture, received our rifle cases, and car pooled back to the armory for function checks and test firing. This was the nerve racking part. Due to liability reasons the only people allowed inside the test chamber are the instructors. They would be taking our rifles in groups of five which would take some time as they run an 8 round clip through each rifle and stop after every first round to collect the casing to give us each the first case fired from our rifle. So they took our rifles into the chamber and shut the doors as well all stood around waiting for our turn and counting the pops hoping to hear 40 pops and 5 pings. Now we had been told on day 1 that about 30% of the class would have some sort of issue during the test fire but none of us really believed it. The number was closer to 40% of us having issues, most of them issues with the rifle short stroking which is the problem that I had. Anticipating issues, the instructors brought along boxes of spare parts. Now short stroking in a Garand was with every other gas operated fire arms is the result of an issue in the gas system. My gas plug was fine which left the gas chamber or operating rod. Now I didn’t want to have to change my gas chamber since it holds my front sight and was timed to my barrel and receiver about perfectly as humanly possible so that left my op-rod. I opened up my rifle with one of the instructors. We started to pull my op-rod to replace it with another on but noticed by follower arm, which hold the op-rod spring inside the op-rod had a bend to it which may have been binding and keeping the op-rod from cycling freely. We changed that out and my rifle. My rifle went back into the chamber and while better it was still short stroking. So we changed out my op-rod, sent the rifle back into the chamber and 8 pops and a ping later I was presented with a safe and fully functioning M1 Garand. Once everyone was finished we went back the Custom Shop for lunch which was catered by Moe’s (similar to Chipolte or Qdoba if you haven’t heard of it). After we continued with the accurizing process with involve unitizing and free floating the front hand guard, glass bedding the stock, and installing national match sights. We would not have the option to do any of these as they are all fairly labor intensive processes, however, they are working on a second AMC course we students would be able to bring their own Garand and go through the accurizing processes to turn their rifle in a national match quality rifle. With that presentation finished we received our certificates, and handshakes and pats on the back for a job well done where exchanged and we were sent on our way which for most of us was to the Marksmanship Park in Talladega to shoot our creations.
Long I know but the I can overstate enough the amount of information and knowledge was imparted during the course of the class. The instructors, Chris Hord; Brent Morrow; Matt Carroll; and Ryan Lidell are all full time Gunsmiths in the CMP Custom Shop and combined have right around 40 years of gunsmith experience with almost as much of it being specific M1 Garand work. All of them were extremely professional and if they couldn’t answer a question (which happened maybe 5 times total in 3 days) they would find you the answer. They also were patient when we had issues we needed help with and would talk us through the solution instead of doing it for us so we could learn how to correct the issue ourselves. If you are looking for a collectors piece all correct WW2 Garand this is not the class for you. But if you are wanting to own an M1 Garand that shoots like a dream and will be in your family for years to come I cannot recommend this course enough. I walked away from this class with some new friends with a functional piece of living American History. After this class you will see the M1 Garand a piece of wood and steal and as the piece of art that it is. Yes, my rifle as isn’t a collector’s piece, but to me it is priceless as my time, sweat and even a little bit of blood brought it to life.